Control Mode
Mode Settings
Here you can change the operating mode of the controller and set the LED brightness. Three modes are available:

QLab Mode
In QLab mode, the FrenschPress communicates with QLab via MIDI or OSC:
- USB: MIDI MSC Simply connect via plug & play. Both USB ports function identically.
- LED Color: Choose the preferred color for the LEDs
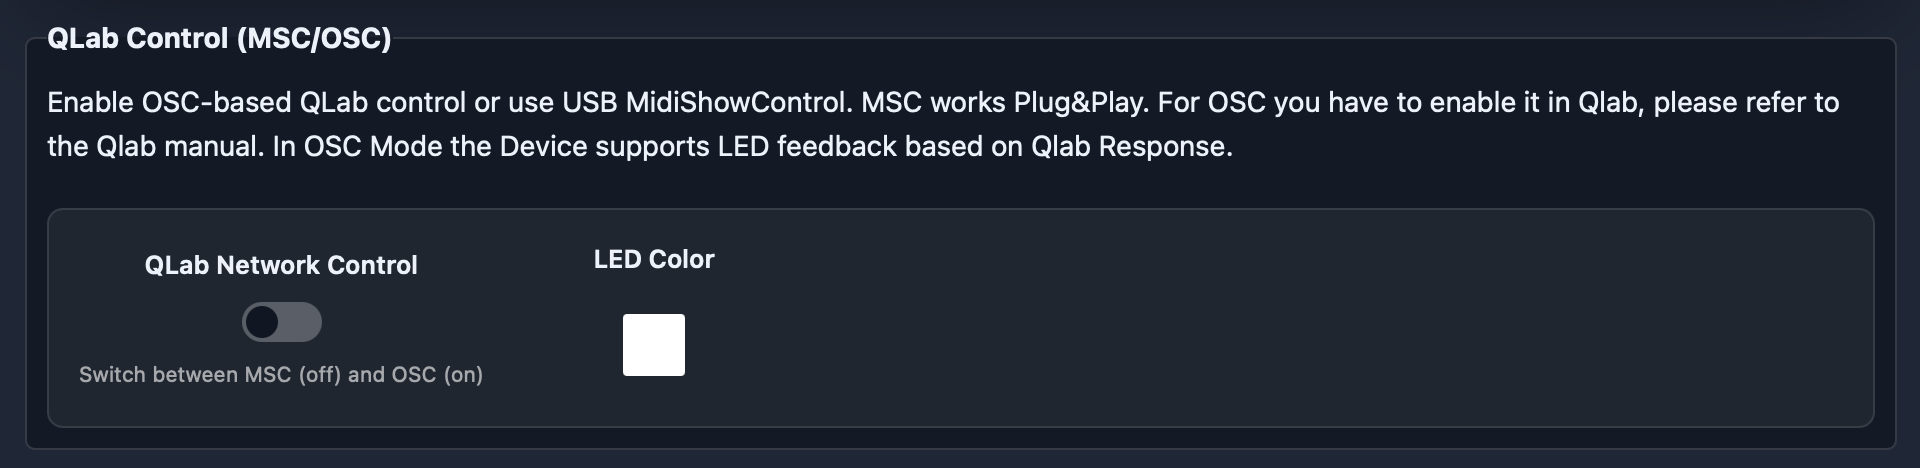
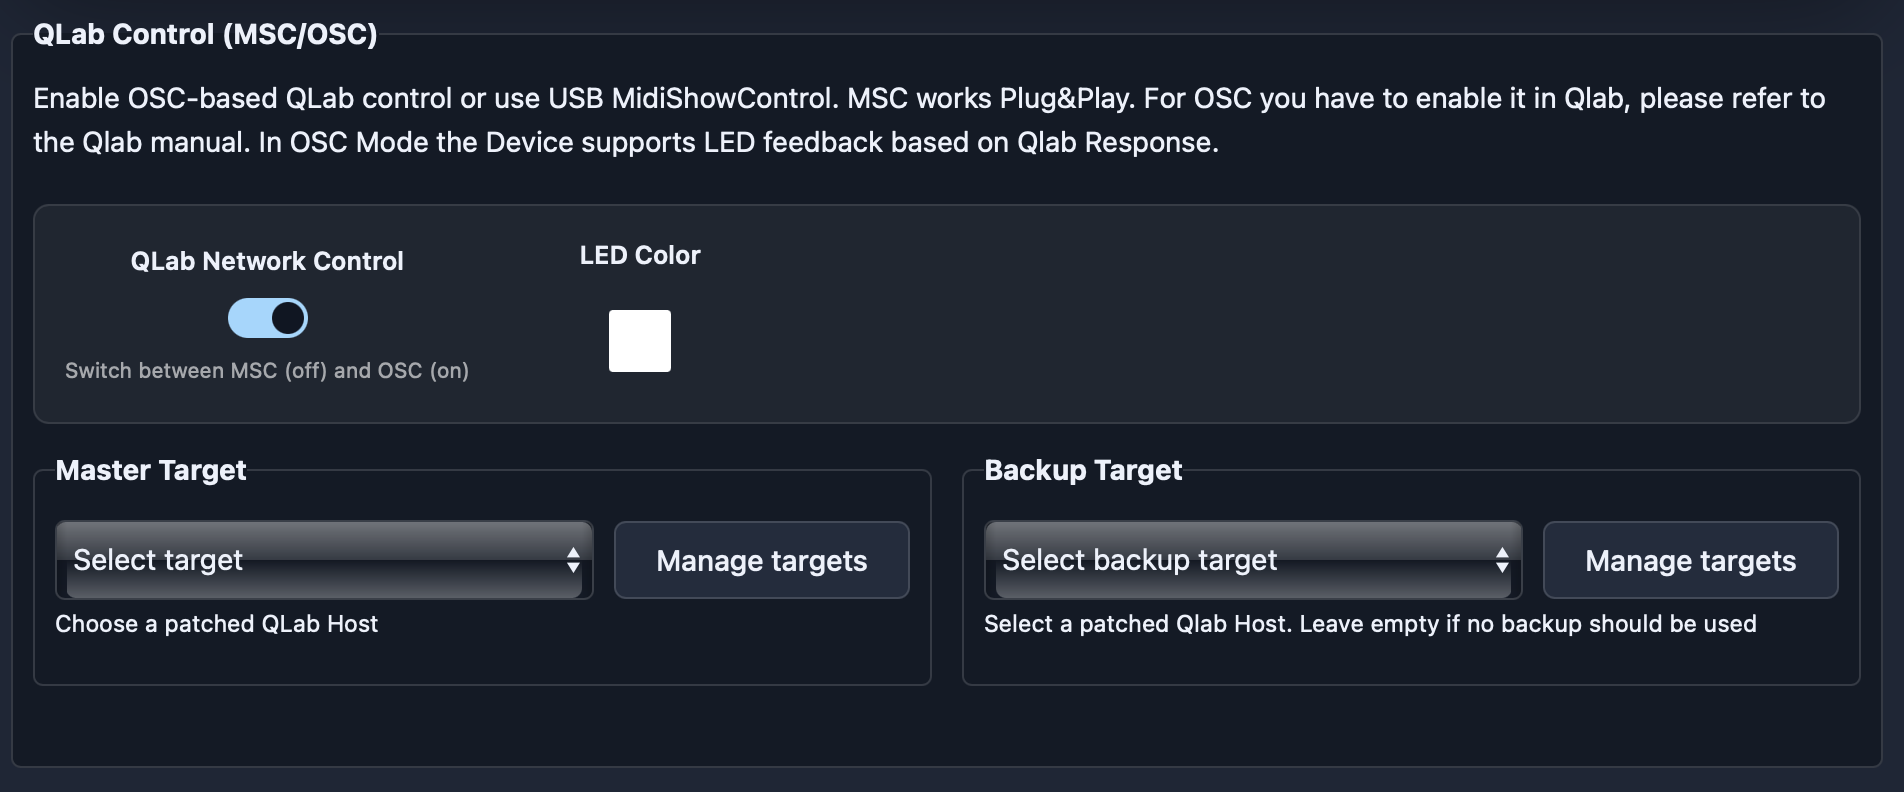
- Network: OSC
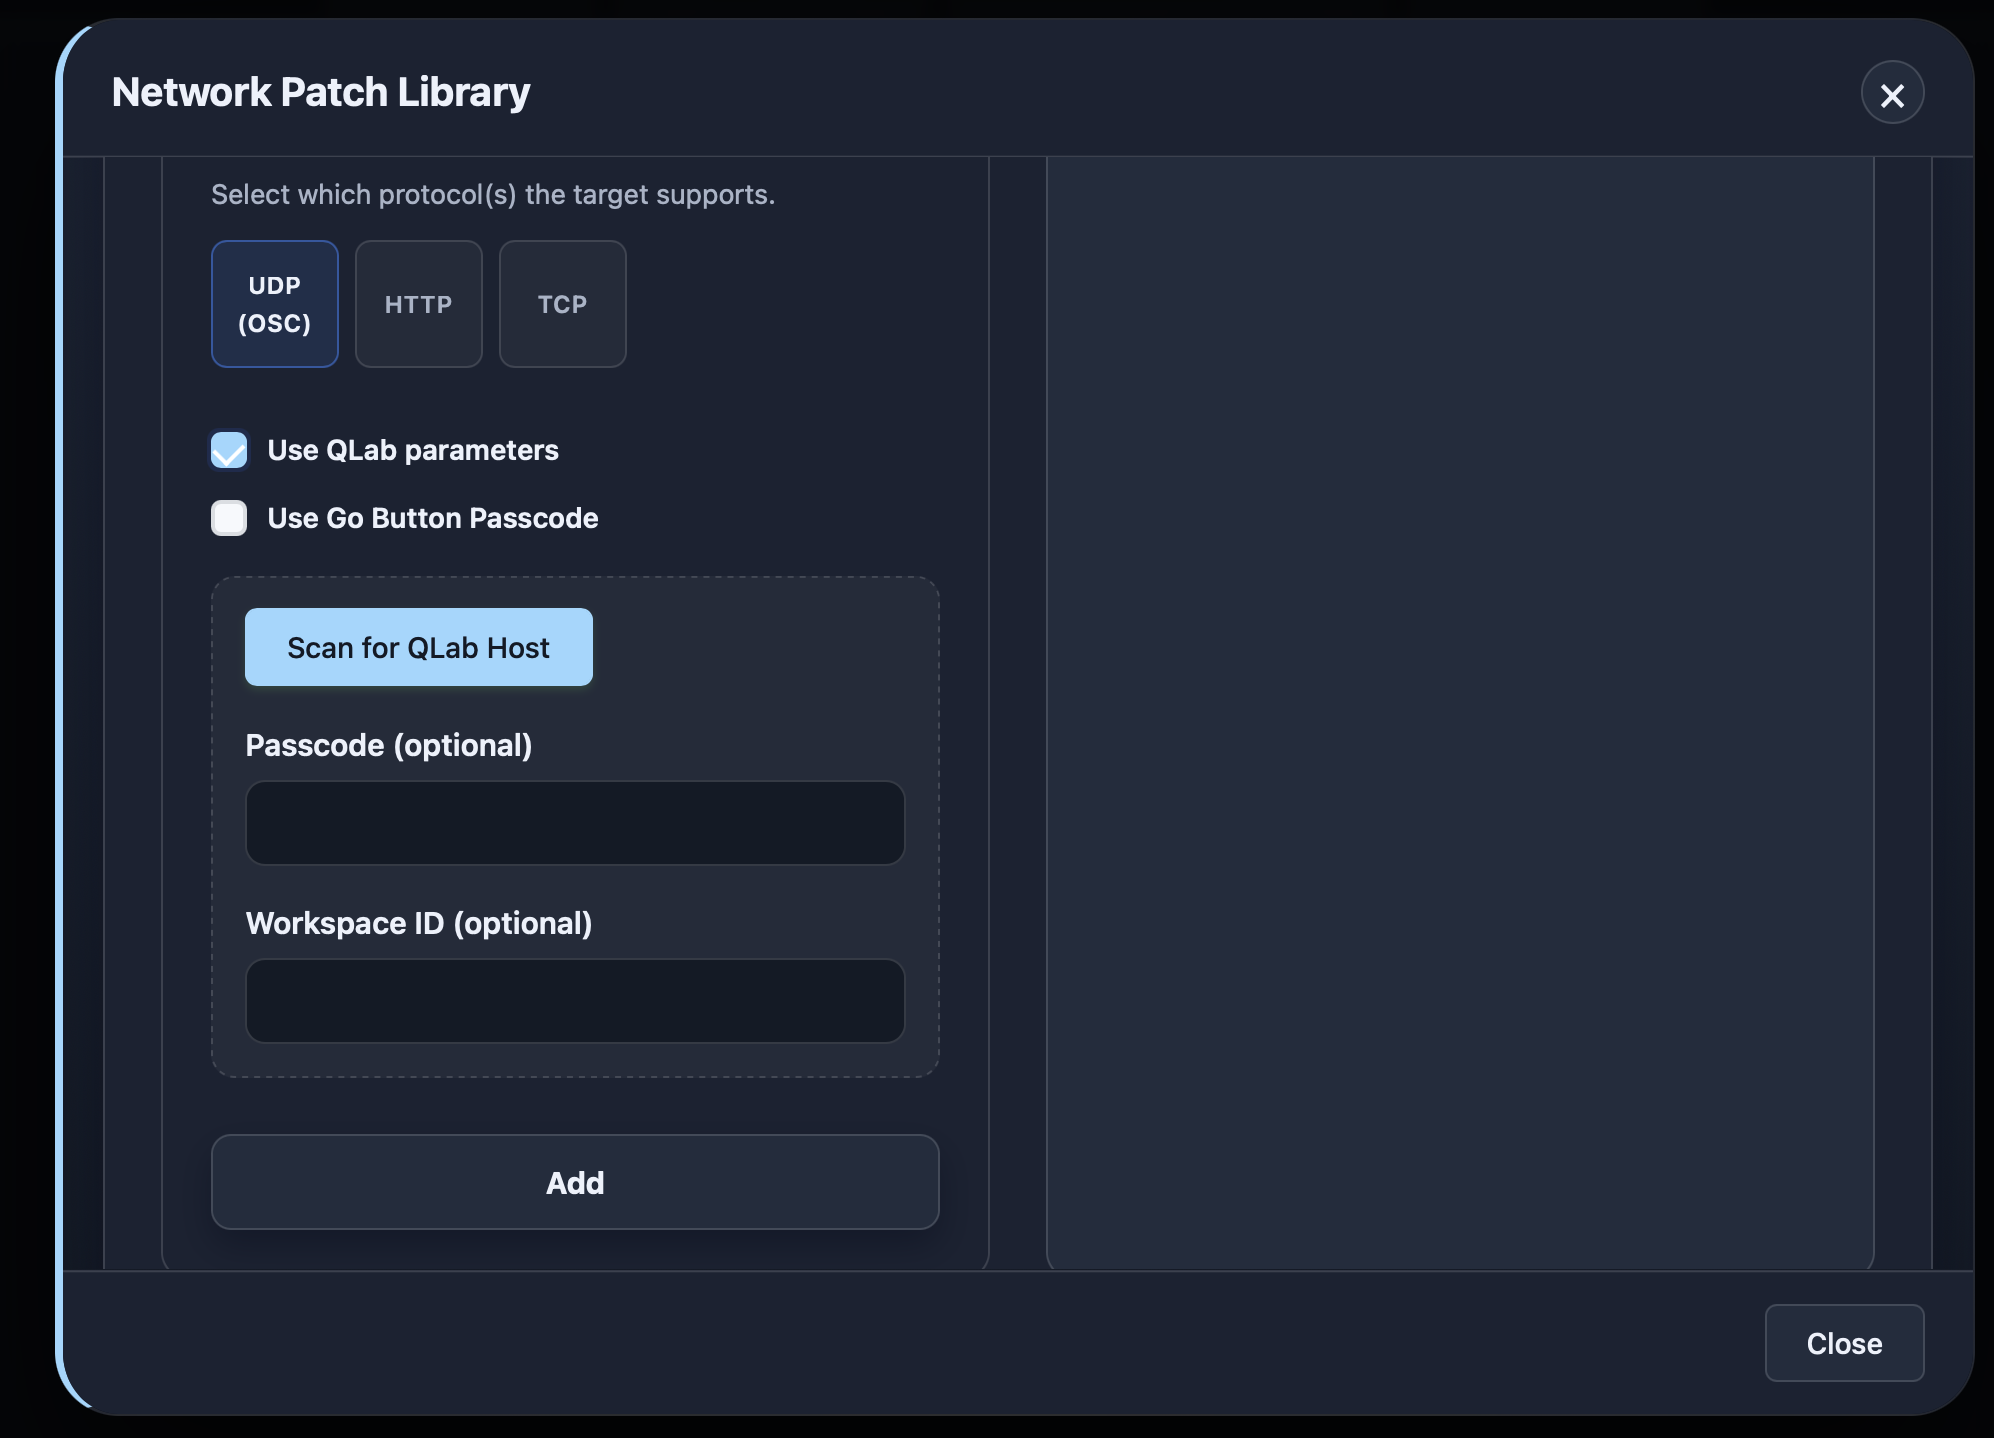
Enable Network Control and select targets for the master and optionally a backup system from the dropdown—done. Targets must be patched beforehand (see Manage). - In OSC Mode the Cue-State is shown on the LEDs (Running Cue - Green, Pause - Orange)
There is also an option to set up OSC automatically:
- Press the Tools → Scan for QLab/GoButton Hosts button in the interface, or
- Hold the encoder push for about 5 seconds (see Button Combinations)
A blue running light indicates an active scan.
A green blink indicates a successful setup.
A red blink means no active QLab host was found.
If a passcode/ID is required, it must be configured manually for the respective target.
For OSC mode (and scanning) to work, OSC must be enabled in QLab. Please refer to the Qlab documentation.
Custom Mode
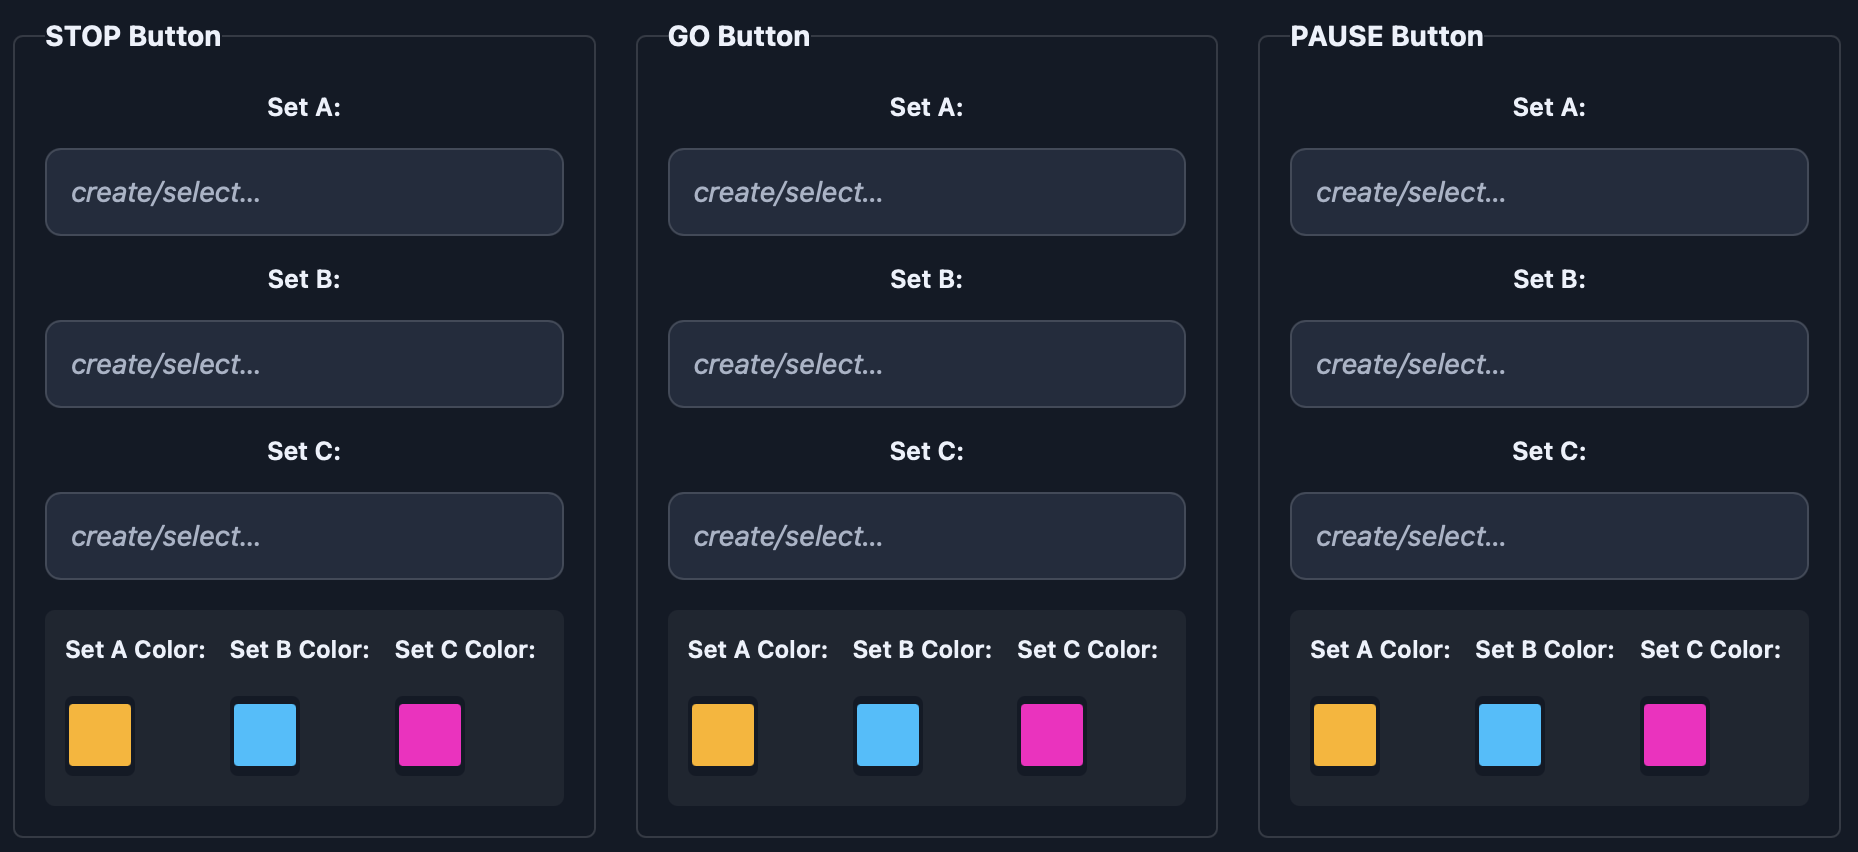
In Custom Mode, the controller can be fully customized. Presets can be saved and loaded, and each button can be assigned its own function.


This allows assigning up to three functions per button, depending on the active set. LED colors can be configured individually per set.
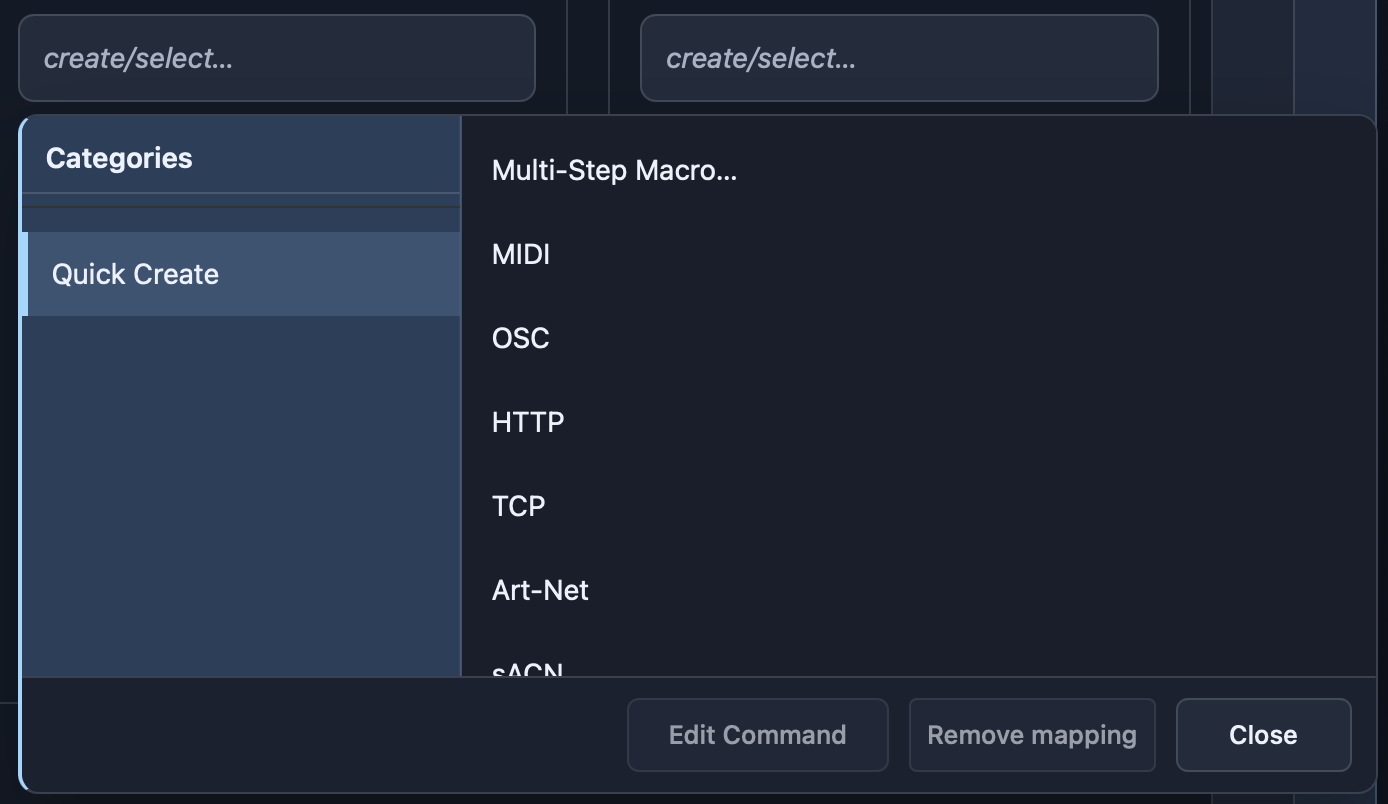
Available command types in Custom Mode:
- MIDI: Note, Control Change, Program Change & SysEx (via USB)
- OSC: Open Sound Control (optionally with QLab passcode)
- HTTP: GET / POST / PUT / DELETE
- TCP: OSC, MIDI, RAW socket
- Art-Net: DMX values with universe/channel, optional fade, unicast/broadcast
- sACN: DMX values with universe/channel, optional fade, unicast/broadcast
- Delay: wait times between macro steps (milliseconds)
- Snapshot: Art-Net/sACN (DMX recorder for up to 10 universes)
The Switch Set macro allows switching between button sets (A/B/C). It can be assigned to any button and configured individually.
You can switch individual buttons or all at once. For example, a configured encoder push can rotate through sets:
A → B → C → A
Creating / Assigning Commands
- Create a single command, or
- Create a multi-step macro
Single Command
Configure the command in the dialog and save with Create & Assign.
The macro is now assigned to the button and stored in the Custom library.
For network macros:
- Select the target on the left
- Define the command on the right

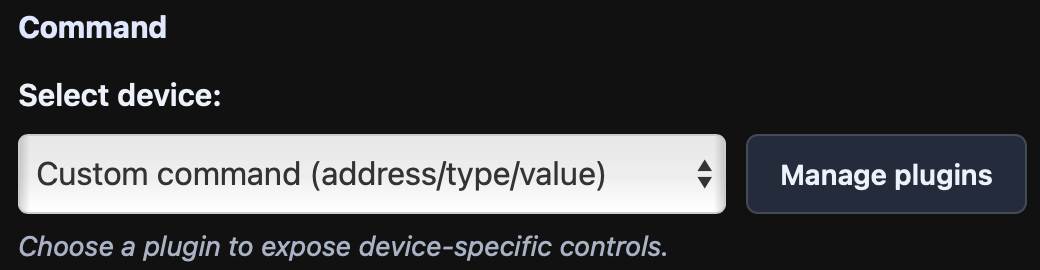
Depending on installed plugins, you can choose predefined commands or create your own.
You can also test the macro directly and optionally set a “Time between Go” to prevent accidental double triggers.

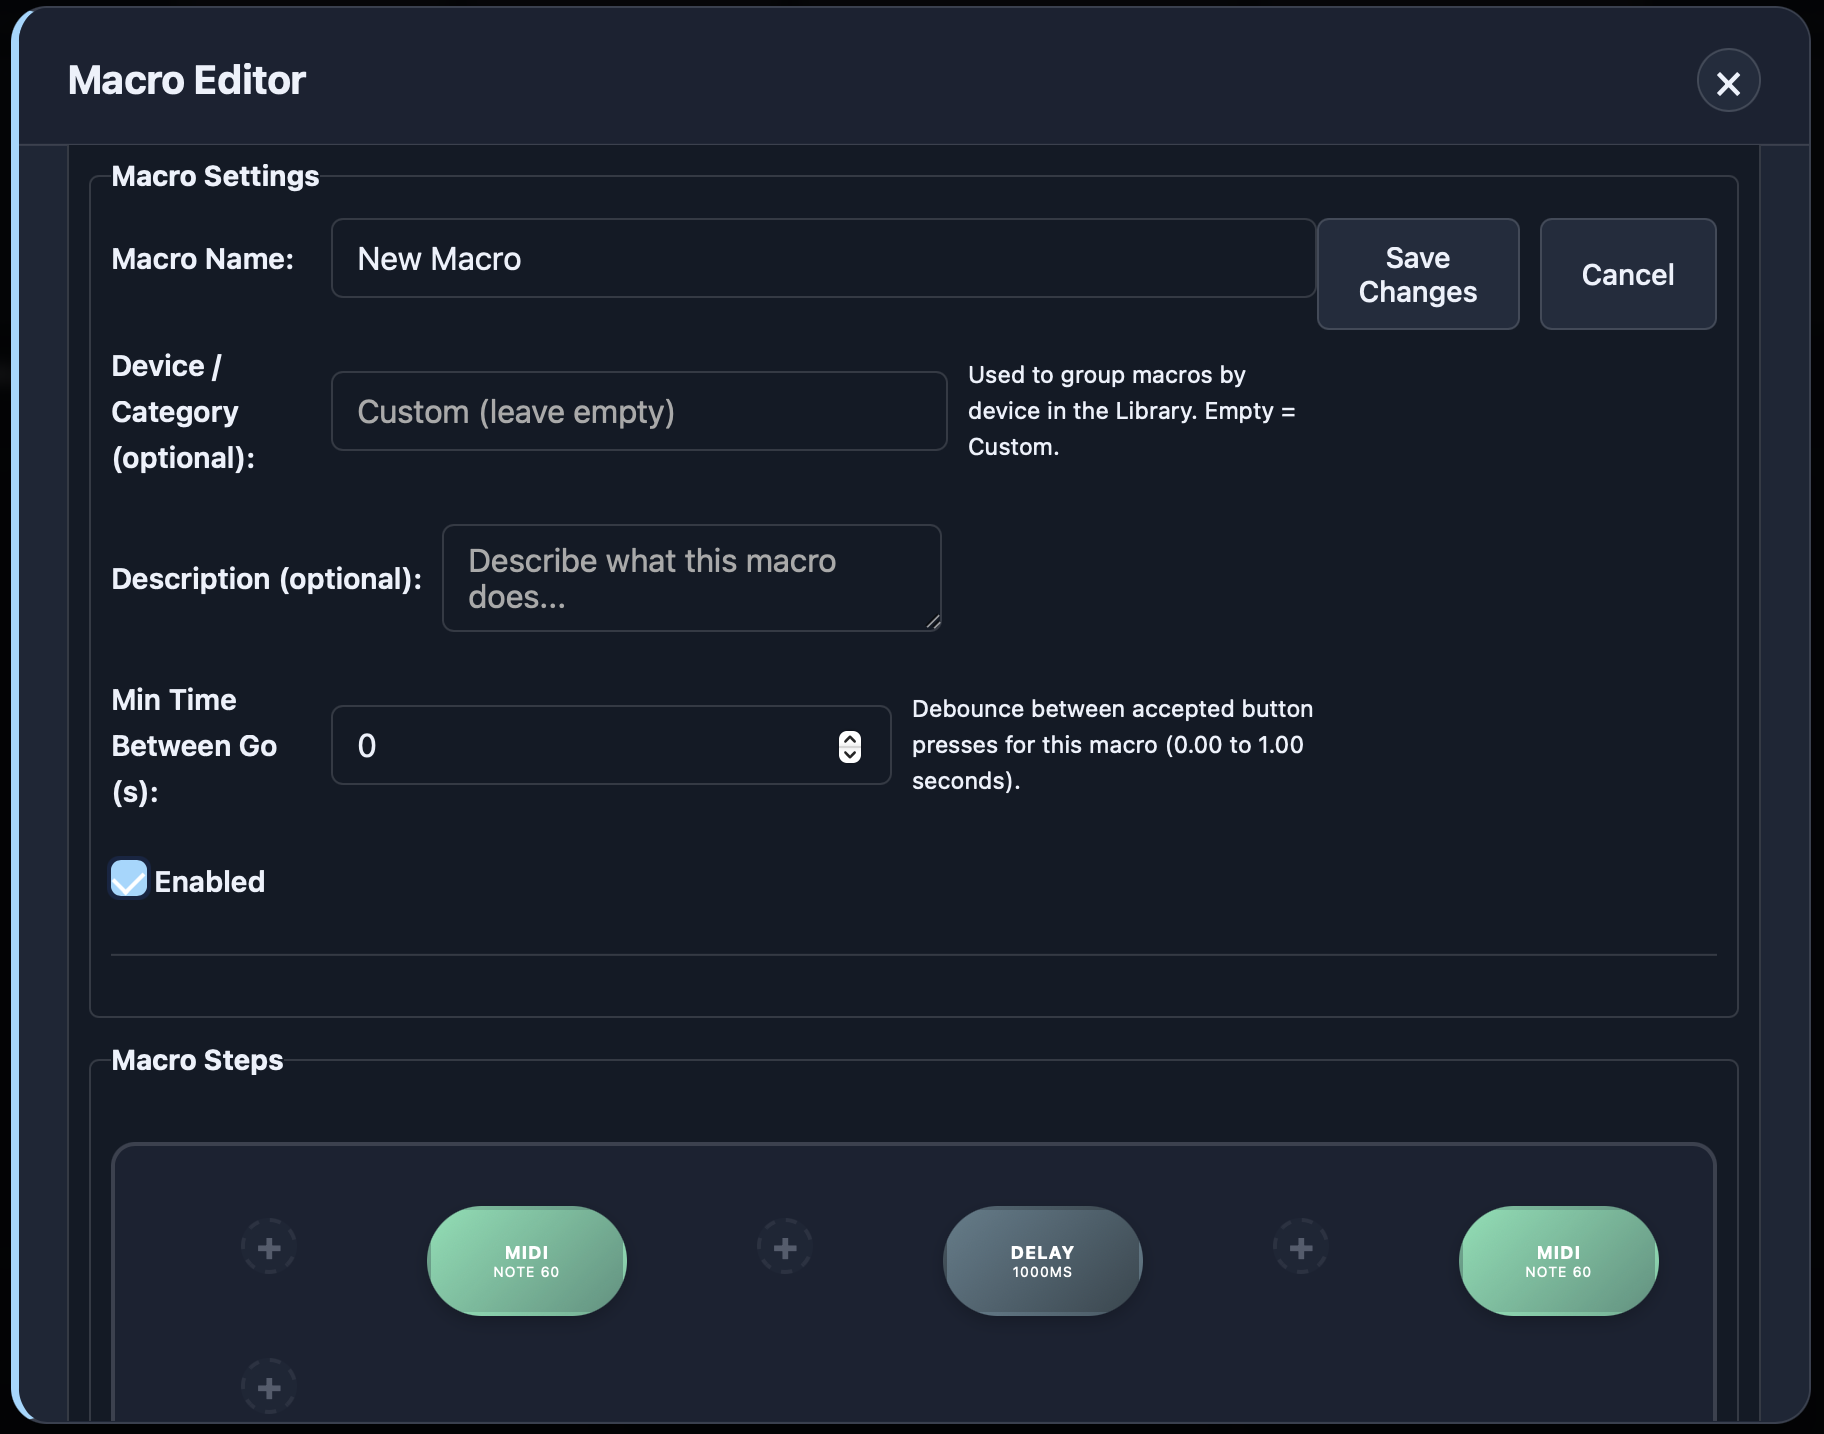
Multi-Step Macro
Set a name and description, then configure the sequence of steps in the step editor below.
Steps can be reordered via drag & drop.
Save the macro with Save Changes.
It will be assigned to the button and stored in the library under Custom or the defined device name.
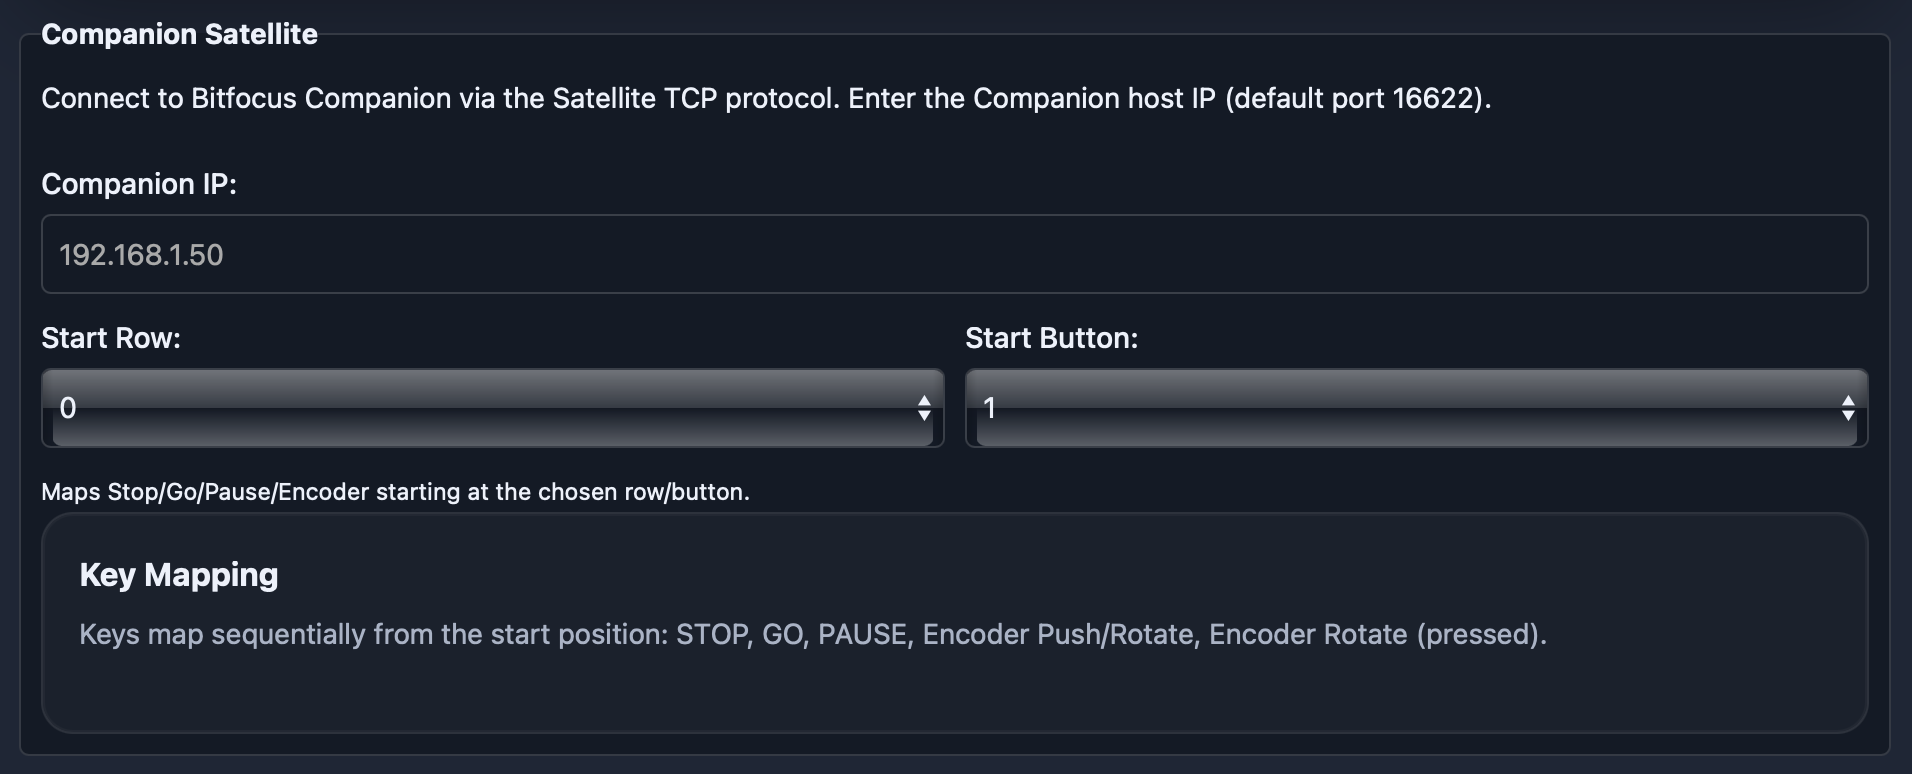
Companion Mode
In this mode, the FrenschPress can be used as a surface (satellite) for Bitfocus Companion.
You can either:
- Enter the IP address of the Companion host manually, or
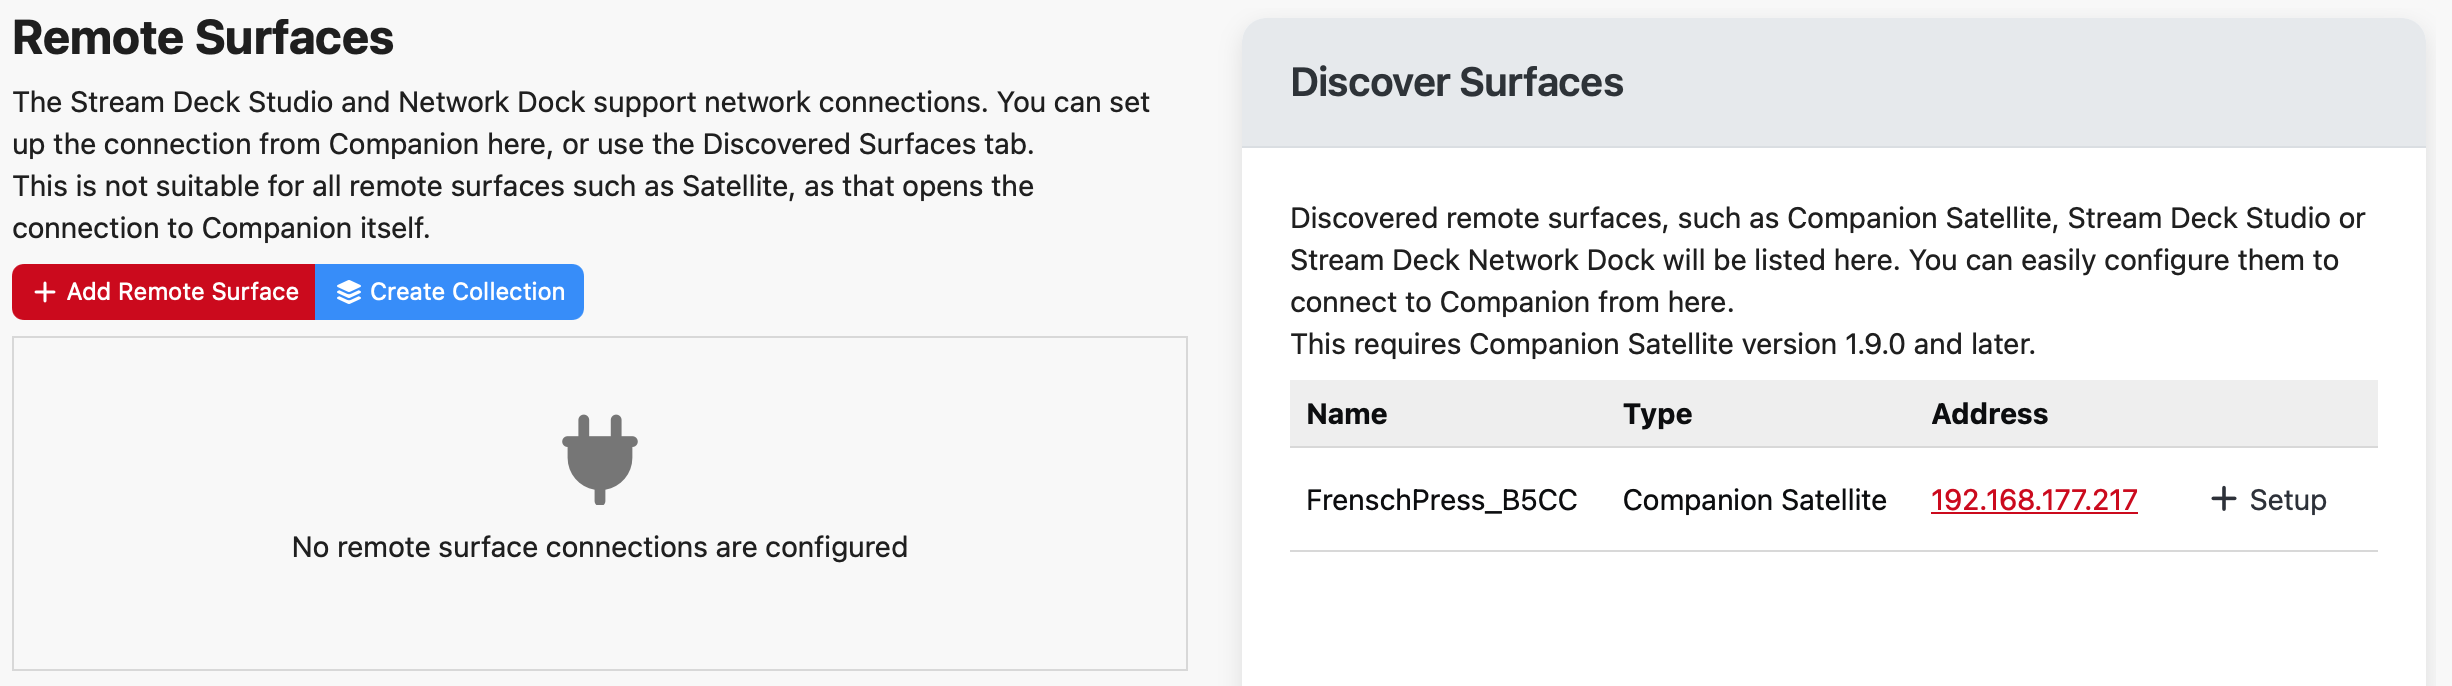
- Configure everything directly from Companion
The FrenschPress appears under Surfaces → Remote in Companion and can be set up there.
Default settings:
Start button and row are set to 1/0/1 to 1/0/5, but can be adjusted on the device.
LED colors and feedback can be controlled directly from Companion.
No comments to display
No comments to display